
Since I started learning Rails, I must have created dozens and dozens of Rails applications for learning, experiments, and side projects. I had a text file that documented all the gems I wanted to install for a fresh Rails app, along with the common app settings. Every time I created a new project, I used to go through the file to install all the gems I wanted.
I wish somebody had told me about the Rails config file.
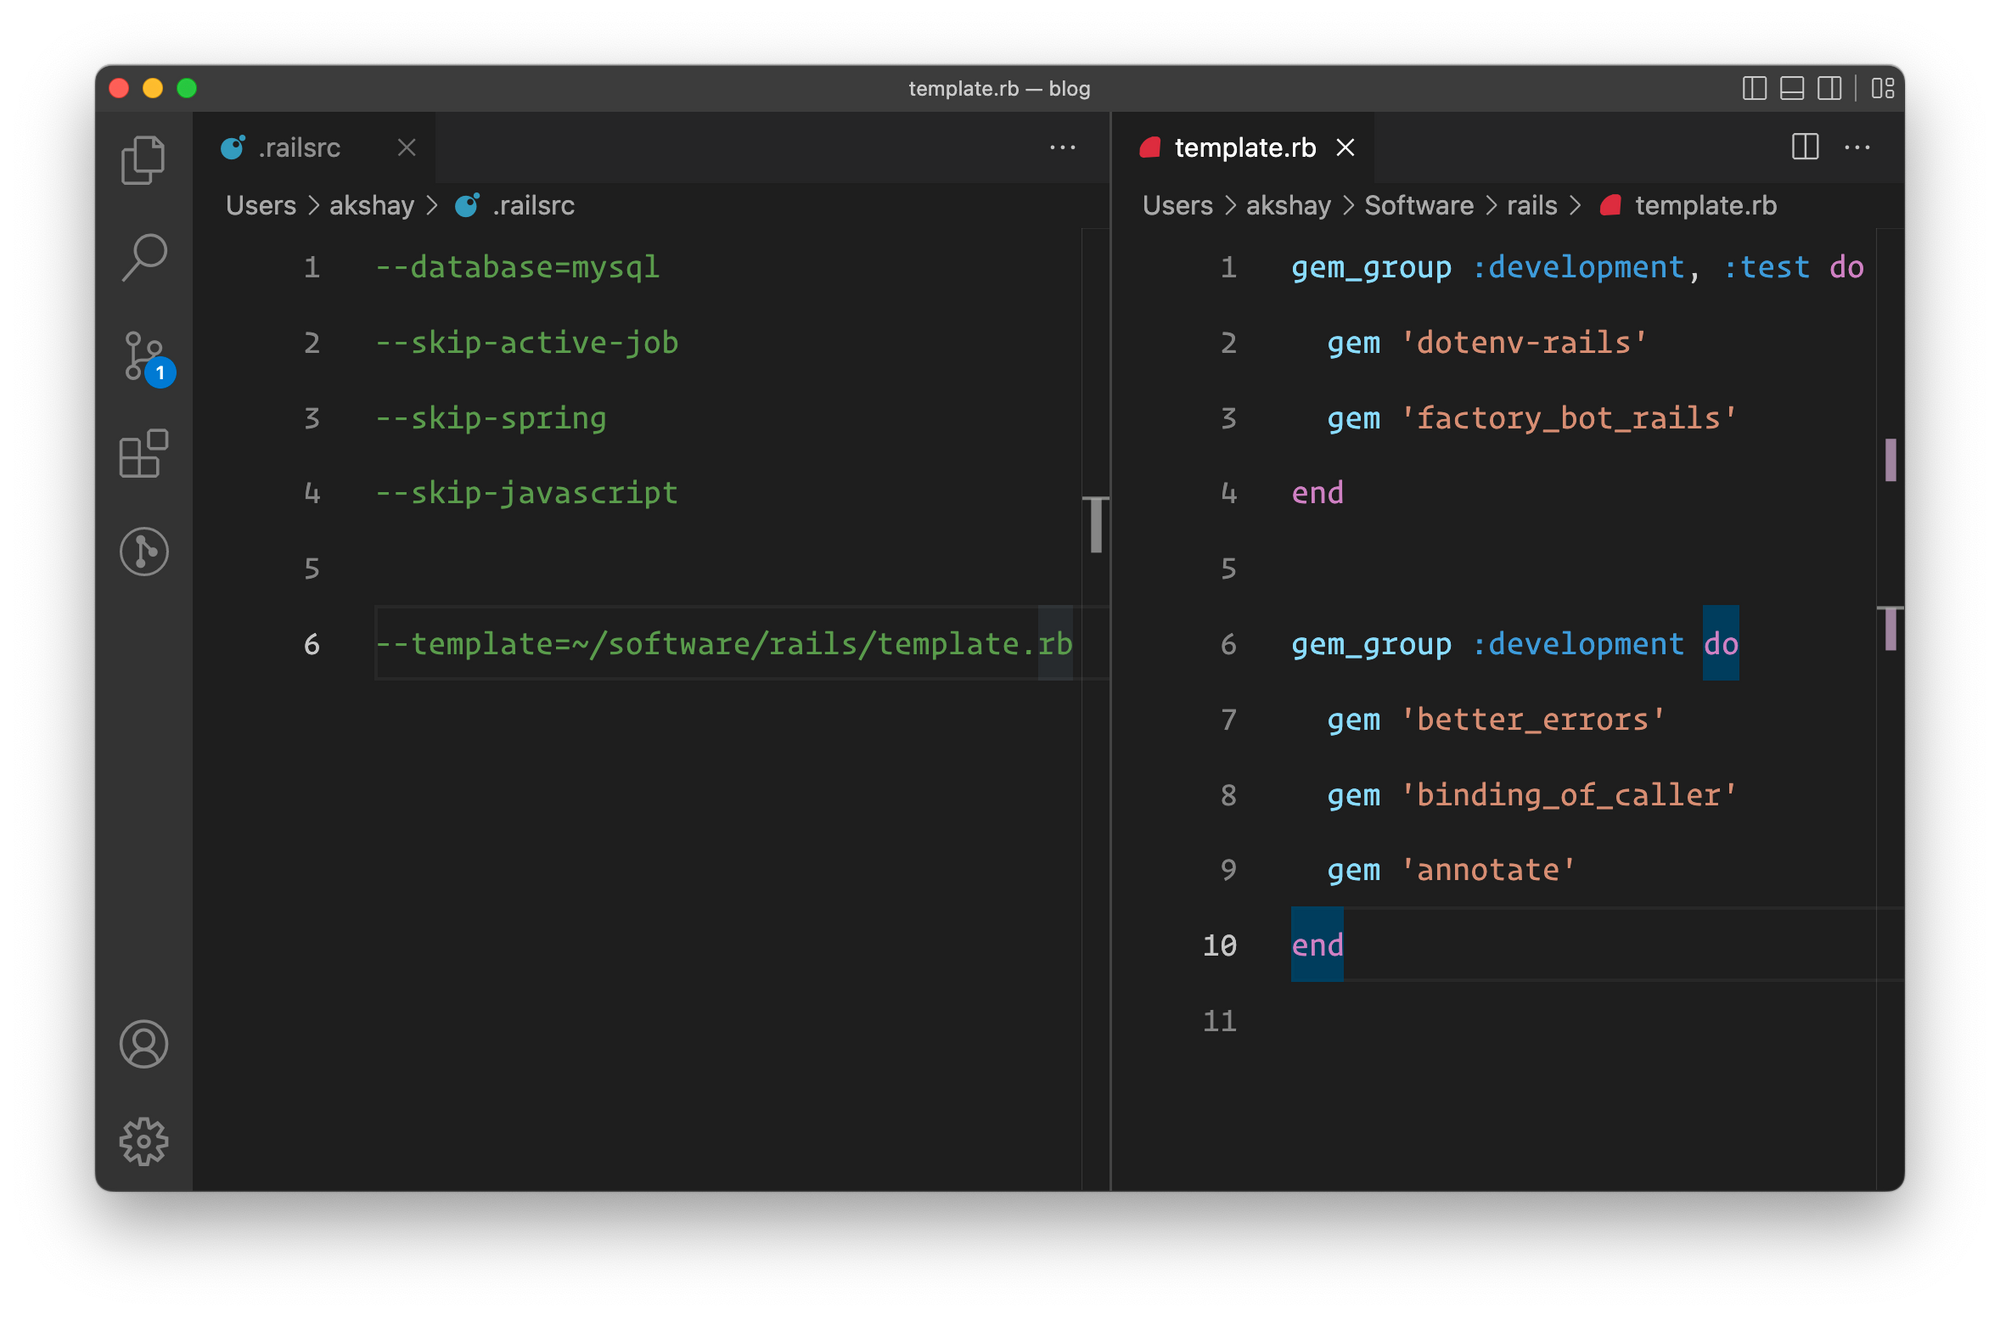
With the ~/.railsrc file, you don’t need to do that. Rails will configure your applications for you. This is even more useful if you find yourself using --skip or --no-skip flags and installing specific gems every time you create a new Rails application.
Let's learn how it works.
Step 1: Create the Config File
First, create a text file named .railsrc in your home directory.
touch ~/.railsrc
Next, add whatever Rails-specific options you want in this file. For example,
--database=mysql
--css=tailwind
--skip-jbuilder

--template=~/software/rails/template.rb
To see all the available options to configure the Rails app, type rails in a non-rails directory.
➜ rails

Usage:
  rails new APP_PATH [options]

Options:
      [--skip-namespace], [--no-skip-namespace]              # Skip namespace (affects only isolated engines)
      [--skip-collision-check], [--no-skip-collision-check]  # Skip collision check
  -r, [--ruby=PATH]                                          # Path to the Ruby binary of your choice
                                                             # Default: /Users/akshay/.rbenv/versions/3.1.0/bin/ruby
  -m, [--template=TEMPLATE]                                  # Path to some application template (can be a filesystem path or URL)
  -d, [--database=DATABASE]                                  # Preconfigure for selected database

  ...
Choose whatever options you need to configure your future Rails applications.
Step 2: Install Gems Using a Template
To pre-configure the gems you’d like to install every time you create a new Rails application, create a template.rb file. Here’s mine:
gem 'lograge'

gem_group :development, :test do
  gem 'awesome_print'
  gem 'dotenv-rails'
  gem 'factory_bot_rails'
  gem 'minitest'
end

gem_group :development do
  gem 'better_errors'
  gem 'binding_of_caller'
  gem 'annotate'
end
Now add the path to the template at the end of your ~/.railsrc file, so the configuration file can use it.
--template=~/software/rails/template.rb
That’s it. The next time you run rails new app, Rails will use the configuration file along with the Gemfile template to create your application just like you want.
For more information about the Rails application templates, check out this guide:


Pretty cool, right?
Let me know what you think in the comments below. If you already use a Rails config file, do share your configuration!
That's a wrap. I hope you found this article helpful and you learned something new.
As always, if you have any questions or feedback, didn't understand something, or found a mistake, please leave a comment below or send me an email. I reply to all emails I get from developers, and I look forward to hearing from you.
If you'd like to receive future articles directly in your email, please subscribe to my blog. If you're already a subscriber, thank you.